Sunday, March 24, 2013

Easter Pudding Eggs

Once upon a time, I discovered a recipe on the back of a magazine for homemade Easter eggs. Being the crafty yet frugal person that I am, I decided to give it a go and present my family with personalized treats. The original recipe called for making eggs of quite a large size, and I soon discovered that a person can only consume so much sweet, sticky Easter egg before being overcome by something akin to nausea. I decided that year that the recipe was flawed and needed tweaking. Thus began my love/hate relationship with Easter pudding eggs.

It's been about 14 years in the works, but after years of testing and tasting, making and remaking, I've finally creating an egg that I am proud of. No, scratch that. I've created eggs that I am proud to say came from my kitchen. And they're delicious. And bite-size.
 
The basic recipe itself is very good and results in a filling not unlike a fondant, but it's awfully sweet and can only be consumed in small quantities. It's basically a mix of pudding mix, hot water, icing sugar and fat. Originally, I made it with margarine, but have come to hate margarine, never have it in my house, and buy it only to make these eggs. So I tried butter and it worked. Now I use butter. 
 
 The resulting dough is like a soft play dough. It shapes beautifully and hardens slightly when chilled. It gets a little soft at room temperature, so when you bite into one of the eggs, well, it's just right.
 I use my trusty 1-inch spring-loaded ice cream scoop to portion out the dough into bite-sized pieces. This is really the ideal size as larger eggs are too much sugar in one sitting, and smaller eggs are cute but much more fussy when it comes to coating, and generally not worth the effort. A rounded 1 teaspoon measuring spoon also works well to portion the dough.
 What I changed this year was the flavoring of the eggs. I've always just gone with the flavor of the pudding mix and called it a day. This time, I thought, why not use the pudding as a base, and build on it? Lots of things go with vanilla, and can possibly overpower it to create a completely different flavor altogether. So I embrace the idea of changing the filling of my Easter eggs.
I tossed coconut flakes and flavoring into one part, lemon zest and juice with yellow food coloring into a second part, and turned the third into a marzipan with almond flavoring and ground almonds. All three were delicious and flavorful and surprisingly less sweet.
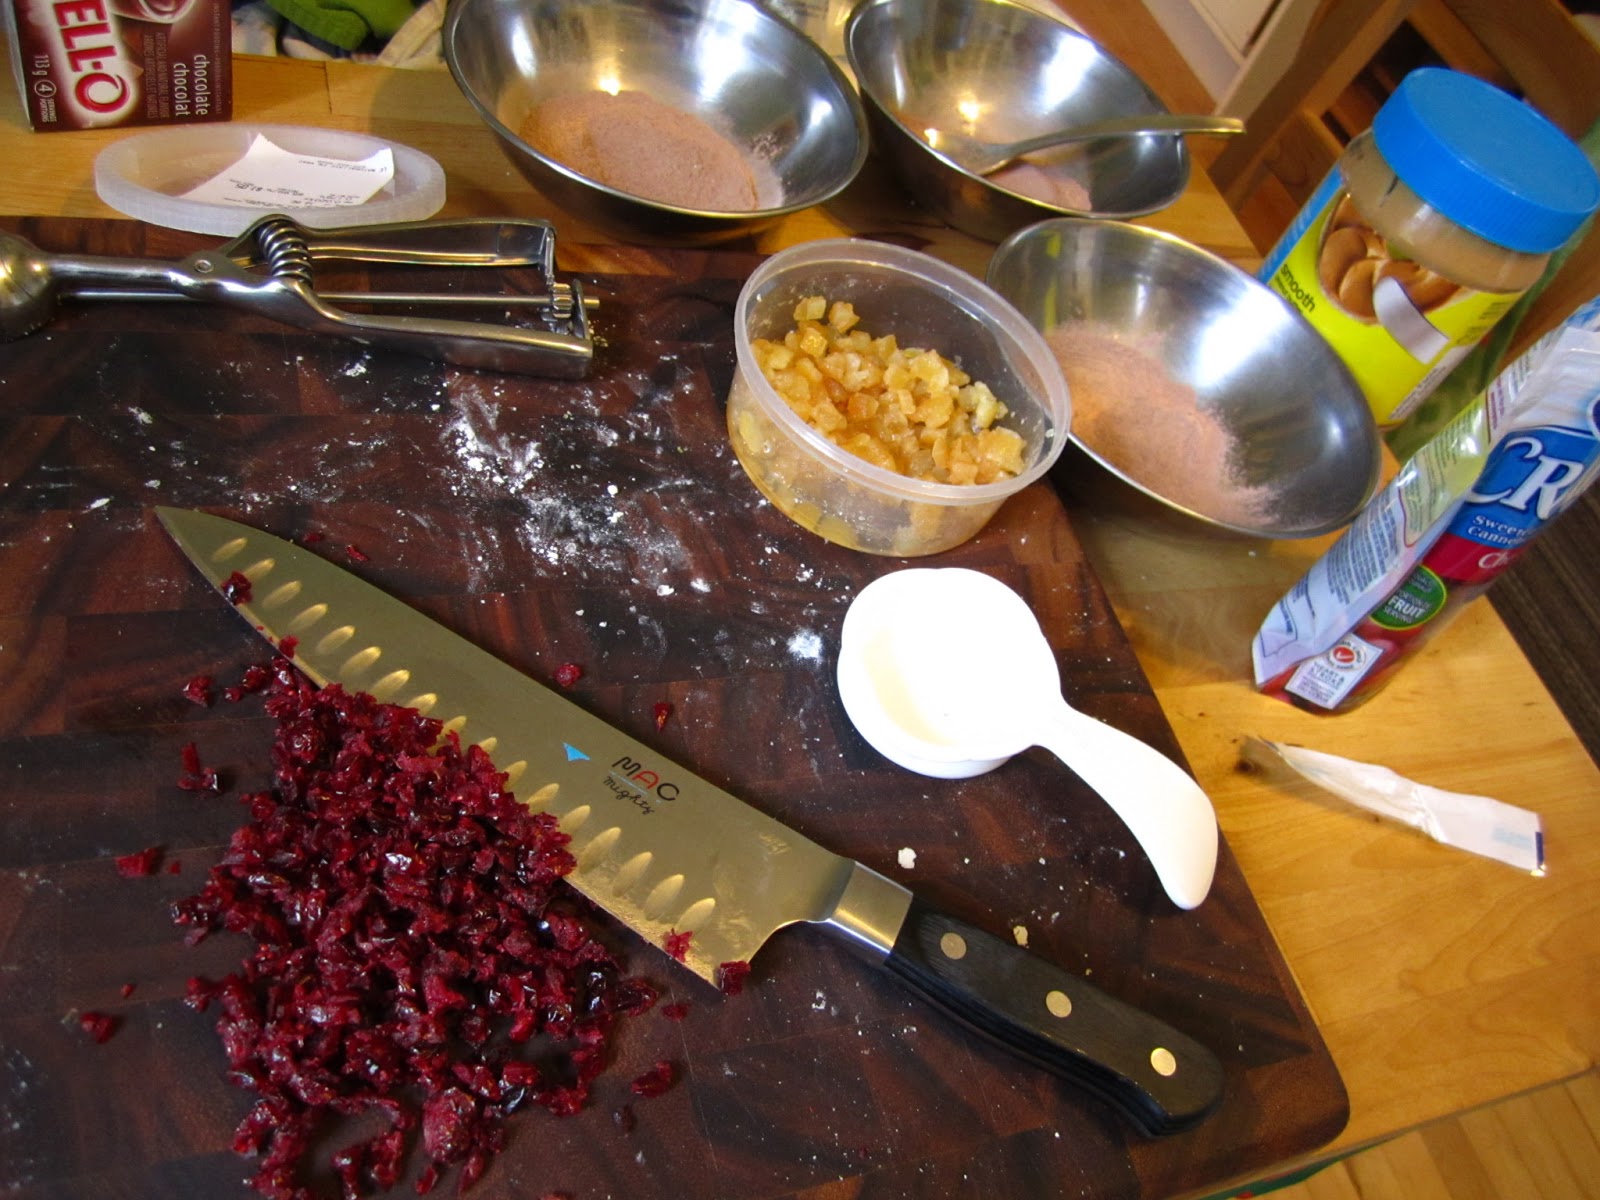
 Next, I played around with the chocolate batch, with less overall success. I tried peanut butter, which tasted AMAZING but changed the overall texture and consistency of the dough. I made a chocolate-orange filling with orange juice and candied peel, but the flavor didn't jump out at me the way the lemon did. I chopped up dried cranberries and toss those in, but it just became a chocolate filling with dried cranberries. OK, but not blowing my tastebuds away.
 I rolled out the balls of dough into egg shapes, place them on baking sheets and set them in the fridge to chill overnight. This step is essential, as I have learned in past attempts that soft centers melt in hot chocolate. Chilling overnight breaks up the work, and I get less fed up of making all these eggs by the end of the weekend. Simply put, making 70-something Easter eggs become a less daunting task.
 I melted a whole bunch of candy coating wafers in the microwave to coat the egg fillings. I use the 30 second heat-stir method, and the chocolate always comes out smooth. I also used white candy coating for some of the eggs.
 The best dunking method I've discovered is using a brochette stick. I dip the stick in the melted chocolate then stab an egg filling.
 I then dip the egg  into the chocolate, swirling to coat completely.  I gently tap the stick on the edge of the bowl to knock off any extra chocolate - an extra-thick shell throws off the balance with the filling.
 I then push the egg down on a baking sheet lined with aluminum foil and carefully pull out the brochette stick, swirling the chocolate over the hole left behind.
 Sometimes I just cover the hole with something - in this case, I topped these "marzipan" eggs with almond slivers, which tells what's inside, as well as making them look pretty.
 I did the same for the rest of the flavors, since this time the insides, rather than the outsides changed. In the past, I have done different coatings while the filling remained the same. This also lets people know what to expect when they bite into an egg. I am not one of those "Life is like a box of chocolates" people. I like to know what I am eating.
 These are lemon-filled, so I figured yellow sugar with white chocolate would do. In the background are the peanut butter ones - they have no decoration on top. After all, what would you put?
 So the results of this year's experimentation, left to right: Marzipan, chocolate cranberry, coconut(tastes like a mounds bar!).
Again, left to right: chocolate and peanut butter, lemon, chocolate orange.
Previous years have included pastel-colored Easter eggs that were pretty to look at but rather plain and sugary to eat, and chocolate-covered eggs with yellow yolks in the middle. Also pretty, and challenging to make, but again, all sugar.


Easter Pudding Eggs (adapted from Kraft Canada)

1 package instant pudding mix (flavor of choice)
1/3 c. butter, softened
1/3 c. boiling water
3 c. icing sugar
8 oz. candy coating wafers

In a heat-proof bowl, place the pudding mix and the butter. Add the boiling water and stir until the butter is melted and the mixture is smooth. Add the icing sugar and mix until the dough forms a ball.
Using a 1-inch, spring-loaded ice cream scoop, portion out the dough into balls. Roll each ball into an egg shape and place on a foil-lined baking sheet. Place eggs in the fridge to chill overnight.
 In a small glass bowl, heat chocolate candy coating wafers in the microwave for 30 seconds at a time, stirring after each, until melted. Dip egg centers into chocolate and place on foil-lined baking sheets to harden. Store in covered containers at room temperature.

Makes 36 eggs.

Varitions:

Coconut - use vanilla pudding mix. Add 3/4 c. unsweetened coconut flakes and 1 1/2 tsp. coconut flavoring to mix with boiling water.
Lemon -   use vanilla pudding mix. Substitute 1/3 c. heated lemon juice for boiling water. Add zest of 1 lemon and 15 drops yellow food coloring to mix with heated lemon juice.
Marzipan - use vanilla pudding mix. Add 3/4 c. ground almonds and 1 1/2 tsp. almond flavoring to mix with boiling water.
Peanut Butter - use chocolate pudding mix. Add 1/2 peanut butter to the mix with the boiling water. You might have to add a bit more icing sugar to the dough to make it workable.
Orange - use chocolate pudding mix. Substitute 1/3 c. heated orange juice for the boiling water. Add 2 tbsp. chopped candied orange peel to the mix with the boiling water.
Cranberry - use chocolate pudding mix. Add 1/4 c. chopped dried cranberries to the mix with the boiling water.


Otherwise, go crazy! See what combination you can come up with - but don't forget to share!

A great way to present the finished eggs is in mini muffin paper liners, tucked into a recycled chocolate box. I always have a couple hidden in a cupboard somewhere just for this purpose. A few sheets of pretty paper glued on top, a nice ribbon tied up in a bow, and you have yourself an awesome Easter treat for the whole family!

Sunday, March 17, 2013

Starting the day Irish

Happy St.Patrick's Day! On this day of kissing the Irish, Bailey's and Guiness and all things green, I am baking up some soda bread for a dinner tonight while my beloved heads downtown to march in Montreal's St. Paddy's Day Parade. Hope your day is filled with good friends and fun, and maybe a few libations? But please, no green beer.
 
And if you're looking for a good way to start off the day, why not try some green shamrock biscuits? They're tender, sweet and spiced with nutmeg, and go great with your irish coffee - and they'll take you all of 20 minutes to put on the table. Can't beat that!

Green Shamrock Biscuits
(based on Betty Crocker's Buttons and Bowknots recipe)

2 cups Bisquick
2 tablespoons granulated sugar
1 teaspoon ground nutmeg
1/2 teaspoon cinnamon
1/3 cup milk
1 egg
1/4 cup butter, melted
green food coloring
1/2 cup granulated sugar, for rolling doughnuts in

Preheat oven to 400°F. 

In a medium bowl, mix together Bisquick, sugar, nutmeg, cinnamon, milk, and egg until soft dough forms. 

Turn dough out onto a lightly floured counter. Roll dough into a ball and knead five times. Roll 1/2-inch thick and cut with 1-1/2 inch round floured cookie cutter.
 
Place doughnut holes on a parchment paper-lined baking sheet in shamrock shapes. Use trimmings to fashions stems, and press all 4 pieces gently together. (These seams will fuse during baking.) Bake for 8 to 10 minutes, until done and just starting to turn golden brown. 

Mix enough green food coloring into the melted butter to turn it a brilliant green. After baking, brush the surface of each shamrock with melted butter, then sprinkle with sugar. Serve warm. 

Makes about 12 shamrocks. 
 

Wednesday, March 13, 2013

The Taste: the play-at-home game!

So, I don't know if you've been watching reality TV lately(yes I know, how can you possibly avoid it?), but my beloved and I have gotten into watching The Taste. Its concept is simple: chefs are chosen based on their ability to cook up a tasty dish. Seems simple enough, right? You have an hour to cook a dish, portion out a single bite of it into a spoon, which will then served to a well-known chef who knows nothing about you, your cooking abilities or your dish except what they see in front of them and what they put in their mouth. I love it - and it might be because I love that Anthony Bourdain and Nigella Lawson are both judges...

So my beloved and I proposed a sort-of cooking contest between the two of us. Two rules: We had to serve the dishes up in spoonfuls like those on the Taste, and we had to use what was available in the house. This last one may seem weird to you, but our contest took place on a Sunday night, 2 weeks after the last groceries had been done, and we were running dangerously low on staples like bread, milk, and eggs. Also, when we decided to do this, we gave each other the time until the contest to research and plan our meals, which came out to 2 days. 

Here are our dishes:


In the blue corner(my beloved's), sauteed fennel with Ricard, lemon and parmesan
Also in the blue corner(his two appetizers), fried pasta with red peppers and edamame 
(At this point, we both deemed his pasta to be much blander than his usual fare, so he refried it with some sundried tomato pesto. This really saved the dish, but because he had already presented the first version, this version was disallowed. Yes, we're that strict.)
In the red corner(mine), spiced tomato soup with salt & pepper croutons and mozzarella
Also in the red corner, blue cheese puffs (These were a total failure and looked REALLY bad, though they tasted okay. I think, having reduce the recipe so drastically, I must have screwed something up. )
In the main course category, the blue corner proposes roasted butternut squash with a balsamic reduction
and filet mignon with blue cheese on toast, with pan dripping
In the red corner, the main course consists of potatoes Anna(layered with butter and parmesan)
sauteed red pepper and garlic scapes
 and finally chicken, spinach and roast garlic hand pies
For dessert, in the red corner, we have deconstructed mixed berry pavlova
and in the blue corner, upside-down almond-stuffed dates(sometimes you have to turn things on their head to get a better result!)

By the end of the evening, having tasted and cooked most of the night, we were both stuffed, and neither had the energy to declare a true winner. What do you think? Who won?

Pantry Reorganization

Ever feel overwhelmed by unfinished projects? And yet, it is so easy to start up something new, something different, and again be restricted by time, creating yet another unfinished project? I had begun some of those myself over the Christmas holidays, mainly a big pantry reorganization  which had been left to the dust bunnies and shadows when life got in the way. See, I have no doors on my cabinets(a story for another time, believe me) and I was tired of looking at half-empty bags and boxes, mismatched shapes and sizes...it was generally just a zone of clutter and mess. I decided to transfer anything not in a solid container into mason jars of varying sizes. I raided my canning supplies, as well as those of family and friends, and come up with a rather significant stock of empty jars. I was on a roll!
The whole project came to a screeching halt when I decided to label my jars using chalkboard-sprayed lids. The lids themselves were not really a problem, not the idea of using a chalkboard paint - that, in fact, was genius - but the fact that I needed a well-ventilated area in which to complete my vision. Hun.

As you may know, Quebec is a frigid place in the winter. There's no way I was going outside for any amount of time to spray-paint jar lids! And I would have to leave them in the snow to dry...oh, it just wasn't happening. At least not until spring.
So my jars sat in sad-looking rows, covered with plastic wrap, waiting patiently for me to find an opening, an opportunity, so to speak, to finish this project. This weekend, I finally got that chance, in a suddenly-vacated workshop!
I laid lots of newspaper on the floor to protect my spray area (believe me, you can never have enough paper down) and spread out my jars lids and rings. I had already cleaned them and made sure there were no stickers or adhesive left on the lids. Once they got sprayed, there was no going back.
I used Krylon brand chalkboard paint on the lids, but any spray chalkboard paint would work fine for this application, as long as it it formulated for metal. On the rings, I used something a little more strong, Tremclad's Professional Rust Enamel in a semi-gloss black. I wanted something that would clean up better than the matte finish of the chalkboard. Two coats did the trick, and after spraying, I left everything to dry overnight.
Did you know you have to season the chalkboard finish before using it? You do this by completely covering the surface with white chalk, then wiping in clean. It's that easy! So my beloved and I sat at the kitchen table, chalking and wiping and labeling and closing all the jars in our pantry. I have to admit, I like it when I finish a project!
The chalkboard lids are very versatile, because they can be erased and changed with the contents. I mean, I don't know that I'll always have candied fennel seeds in stocks, but if I ever run out, and then fill the jar with walnuts, I'll be able to label them as such. Since, you know, walnuts are hard to distinguish.
Now everything looks so pretty and uniform, maybe I don't mind so much the fact that I don't have doors on my pantry. But I still want them. Just so you don't get any crazy ideas that I actually like the whole open-concept thing.
While I was in a go-and-get'em state of mind, I finished up a few more projects. I resurfaced an old tea tray that was looking worse for wear. I painted on a silent movie card border to make it look even more retro.
And I refinished some tea tins with the same spray paint as the mason jars. Now they look a little less eclectic sitting in plain sight above the stove. 

On a side note, I just wanted to reiterate that there nothing more important when using spray paint than protecting your surrounding areas from over-spray. Because if not, you end up with something that looks like a permanent shadow under your workbench. Just sayin'. 

Sorry. 

And Happy Birthday, Daddy!

Friday, March 8, 2013

Fascinating...

I find myself often making things, completing projects, and later realizing, "Gee, I could've shared how to make that!" I try hard to think of projects that epitomize the idea of working with your supply on hand, when in reality, everything I do involves that supply in some way or another. I just don't realize it because that's how I've always done things, and it doesn't stand out as out-of-the-ordinary anymore. Take my latest craft, for instance: I have a wedding coming up this weekend, and rather than go buy a new dress, I decided I'd wear a nice one already in my closet and make myself an awesome hair accessory to class it up even more. I love the idea of a fascinator(I guess I find them fascinating...), and with the amount of craft bits and such lying around, I was sure I could pull one together easily. 
Now, I'm not saying I hopped over to the sewing workshop, pulled out exactly what I needed, and whipped up a fascinator, as if by magic. In fact, I made a trip to the fabric store for a piece of fabric in a color matching the dress, as well as to the dollar store for some matching tulle. However, I checked my inventory FIRST, before buying anything. I already had some hairbands, black lace, feather, padding for the base and such in stock, so those items lead to how I would put the final project together, what it would look like, and what I ultimately needed to purchase to complete the fascinator. That's how I properly use my resources. Now, on with the crafting!
I put on the headband where I planned to wear it for the wedding, slipped a piece of paper underneath and traced the shape of the base I was going to build my fascinator on. I chose to drop mine a little behind my ear, and curve it slightly outwards towards the top to accommodate the flower I was going to add. Actually, it ended up looking like an ear. I cut out the paper and used it as a pattern to cut out a foam base. This piece is recovered from the bust lining of a bridesmaid's dress - go figure.
I laid the lace out on top of the fuchsia fabric, to mimic the look of the dress. You can see the actual dress in the top left hand corner of the second photo. It's black with a fuchsia-colored lace overlay.
I folded the fabric over on itself, with the lace inside, and pinned the foam shape to the three layers.
Using the zipper foot attach for more clearance, I stitched around the foam shape, leaving an opening for turning the fabric.
I used pinking shears to trim the fabric around the stitching, and clipped the curves for a cleaner-looking turned piece.
I stuffed the foam shape into the fabric pocket, lace side out. This proved difficult, as the foam was very sticky and didn't want to do what I told it to. I may have used force.
After turning the rough edges inside to close the hole, I top-stitched the entire piece with black thread.
At this point, I put the headband back on and tried positioning the base where I wanted it to sit. I took note, removed the headband and hand-stitched the base in place. I made sure that I began high enough up on the headband, where there are teeth. Doing this looks the piece and thread in place and prevents the entire fascinator from sliding off the headband!
There you have it - one base.
Next, I positioned the netting I wanted to use, and pinned it into place. I didn't sew it yet, in case I wanted to change the positioning in relation to the flower later on. On a side note, can you believe I found this piece of netting in a parking lot?! Those threads you see were originally white - I colored them fuchsia to match my dress, using a permanent marker.
Next, the flower: I got this little roll of tight-knit tulle from the dollar store. Actually, it's more of a fine, iridescent mesh, but synthetic, so I knew that I could melt the edges to finish them. I cut out petal shapes of varying sizes, and, carefully holding the fabric close to a candle flame, I gently melted the edges. Note that this only worked for synthetic fabrics, and that you should test your fabric first to determine it flammability. Mine would continue smoldering if I wasn't careful!
I left the bottom ends of the petals unfinished, and gathered them to form the rounded petal shape, using a needle, thread and a long running stitch.
I made a base to which I would attach the petals, using more of the fuchsia fabric. I sewed a long running stitch around the outer edge of a small circle...
...then I gathered the fabric together and flattened the piece, tying off my thread. This is called a "yoyo", and it can be used for a whole myriad of crafting projects, but I decided it would make a good base for the flower blossom.
I hand-stitched the petals, larger ones first, in a circle around the base, layered as I went until I used up all the petals. I made about 15 petals total.
I also added a few black feathers, tacking them in while I was stitching the petals to the base.
Finally, I tested the flower positioning on the netting and headband, trying it on and moving it around until I liked the way it looked. I stitched everything together to the base.
And there you have it, one very fascinating fascinator to match my dress and class up my outfit for a friend's wedding! I'll post the entire outfit after the wedding, so stay tuned!

Now it's your turn - go craft something fascinating!