I returned to my notes for inspiration the other day, deciding on a beautiful little clutch I could whip up on the sewing machine.
Using newspaper, I drew out pattern pieces which I then used to cut out the fabric. I tend to chose projects that have very geometric shapes, visible seams or easy construction. I, in no way, consider myself a pro at this, I just like to tinker around with the sewing machine.The band measures 9 inches by 3 inches, and the pouch section measures 15 inches by 9 inches, with rounded corners along the bottom edge. All measurements include 1/2-inch seam allowances.
I love this fabric. Every time I go looking for inspiration in the fabric closet, I come across this beauty, never really knowing what I should do with it. Finally, I have a project that will do it justice. I paired it with a brown vinyl left over from a costuming project, and a matching teal cotton I pulled from the quilting leftovers.
To match the bottom pouch section to the top band, I had to do a little gathering. It creates a nice visual effect, as well as providing ample storage space in the pouch section of the clutch.
I pinned the pouch to the vinyl band, and stitched the two pieces together. I did this for the other half of the clutch, as well as both sides of the lining.
I pressed the extra fabric towards the band section, then top-stitched the band for added strength and nicely-stitched details. I do like nicely-stitched details!
I stitched the two halves of the lining together. Important: make sure to leave an opening at the bottom of the bag, to turn the piece right side out, Otherwise, be prepared to take up your seam ripper to free your bag!
I added some snaps to the top of the lining, to close the bag better. This is optional - the bag is small enough that a closure is not that important, but should you drop your clutch, snap will prevent your stuff from spilling out and all over the floor. Follow the package direction for installation, or check out some of the awesome vids available on Youtube. That's what I did.
After stitching both sides of the bag together, I turned the outer layer right side out.
I inserted the outside into the lining layer, which is still inside out. This way, the right sides of the fabric are facing each other.
With the seams lined up, I pinned the top edges together...
...and stitched.
See, this is where that hole in the bottom comes in handy. Pull the whole bag through the hole in the bottom of the lining and voila! you bag is turn right side out. Otherwise, get out your seam ripper...
Push the lining inside the bag, press the edge, then top-stitch the top edge.
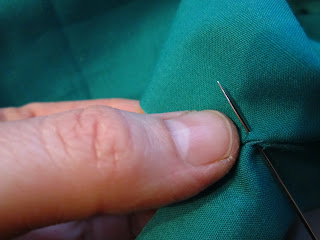
One last line of stitching, this time by hand, to close up the bottom of the lining, and that's it! I managed to finish up my clutch in about 4 hours, with a little playing around with the pieces and such - should take about 3 hours the next time. Think of it as a nice little afternoon project, and elegant enough for an evening out! Now, what to wear...


No comments:
Post a Comment