 Recently, I've been playing around a lot with clothing alteration. Weight loss, though generally a good thing, can be a serious downer on one's wardrobe. Since I don't have a fortune with which to buy an entirely new wardrobe, I've been resizing my favorite pieces for further wearability. It takes courage to cut up and sew an already wearable garment, so once I began with small alterations, my creativity took over and I tried other stuff, like turning a pair of jeans into a skirt, or chopping the arms off a sweater. And I discovered that I liked creating Frankenstein clothing. My latest attempts have proved very successful, as well, and now the challenge is to create as many things as I can from one garment. Call it maximizing on my investments. My latest creation was saved from a stock of dress shirts being shipped out to the local Salvation Army store.
 Since I was going for a sleeveless ruffled blouse, the first order of business was to remove the sleeves, cutting along the shoulder seams. I always cut on the opposite side of the seam I am removing, to allow for a little extra room when hemming the rough edges later on. Next, I turned the shirt inside out and put it on. This is extremely difficult with a button-up shirt. Be warned. I pinned the extra fabric around my bust and along the curve of my back, to give the otherwise straight garment a more feminine shape. I carefully removed the shirt, now full of pins, and stitched in the darts and tucks.
 After trying on the shirt, right way out, I marked the v-neck line with a white pencil. I cut this part out.
 Next came the ruffles. I removed the cuffs, keeping them aside for future consideration, then open each sleeve up by cutting along the seam. I cut two long strips from each sleeve and sewn the 4 pieces together, end to end. Using the iron, I pressed the long strip in half lengthwise to create the finished edge of the ruffle. Back to the sewing machine, I sewed a line of gathering stitch along the long, open end, then pulled on these stitches to gather the fabric into a ruffle.
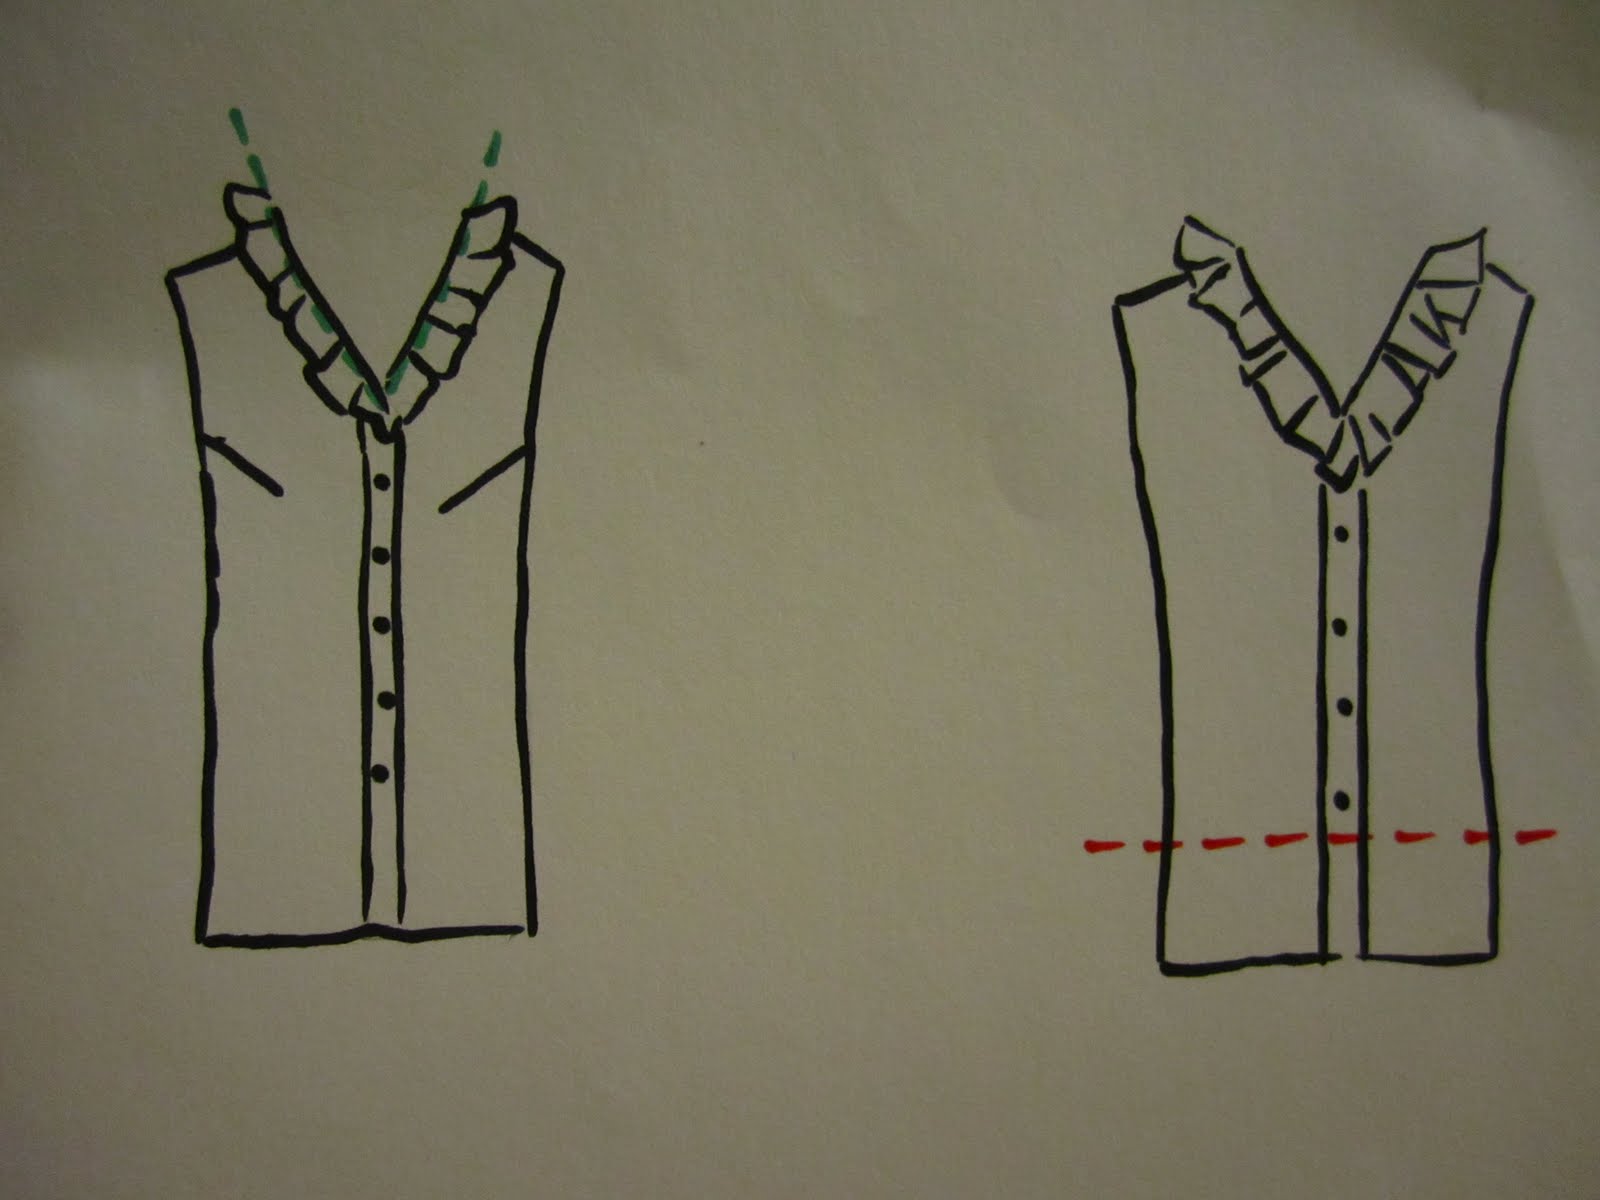 I pressed and finished the ends of the ruffle, them pinned it to the collar of the shirt, spacing and stretching the ruffle as needed to fit along the neckline. Once pinned, I stitch the collar in place, and pressed the raw edges towards the shirt. I top-stitched the raw edge to hide it from view.
Finally, I trimmed the excess length from the bottom of the shirt. I pressed under the raw edges at the waist and on the sleeves, and stitched.
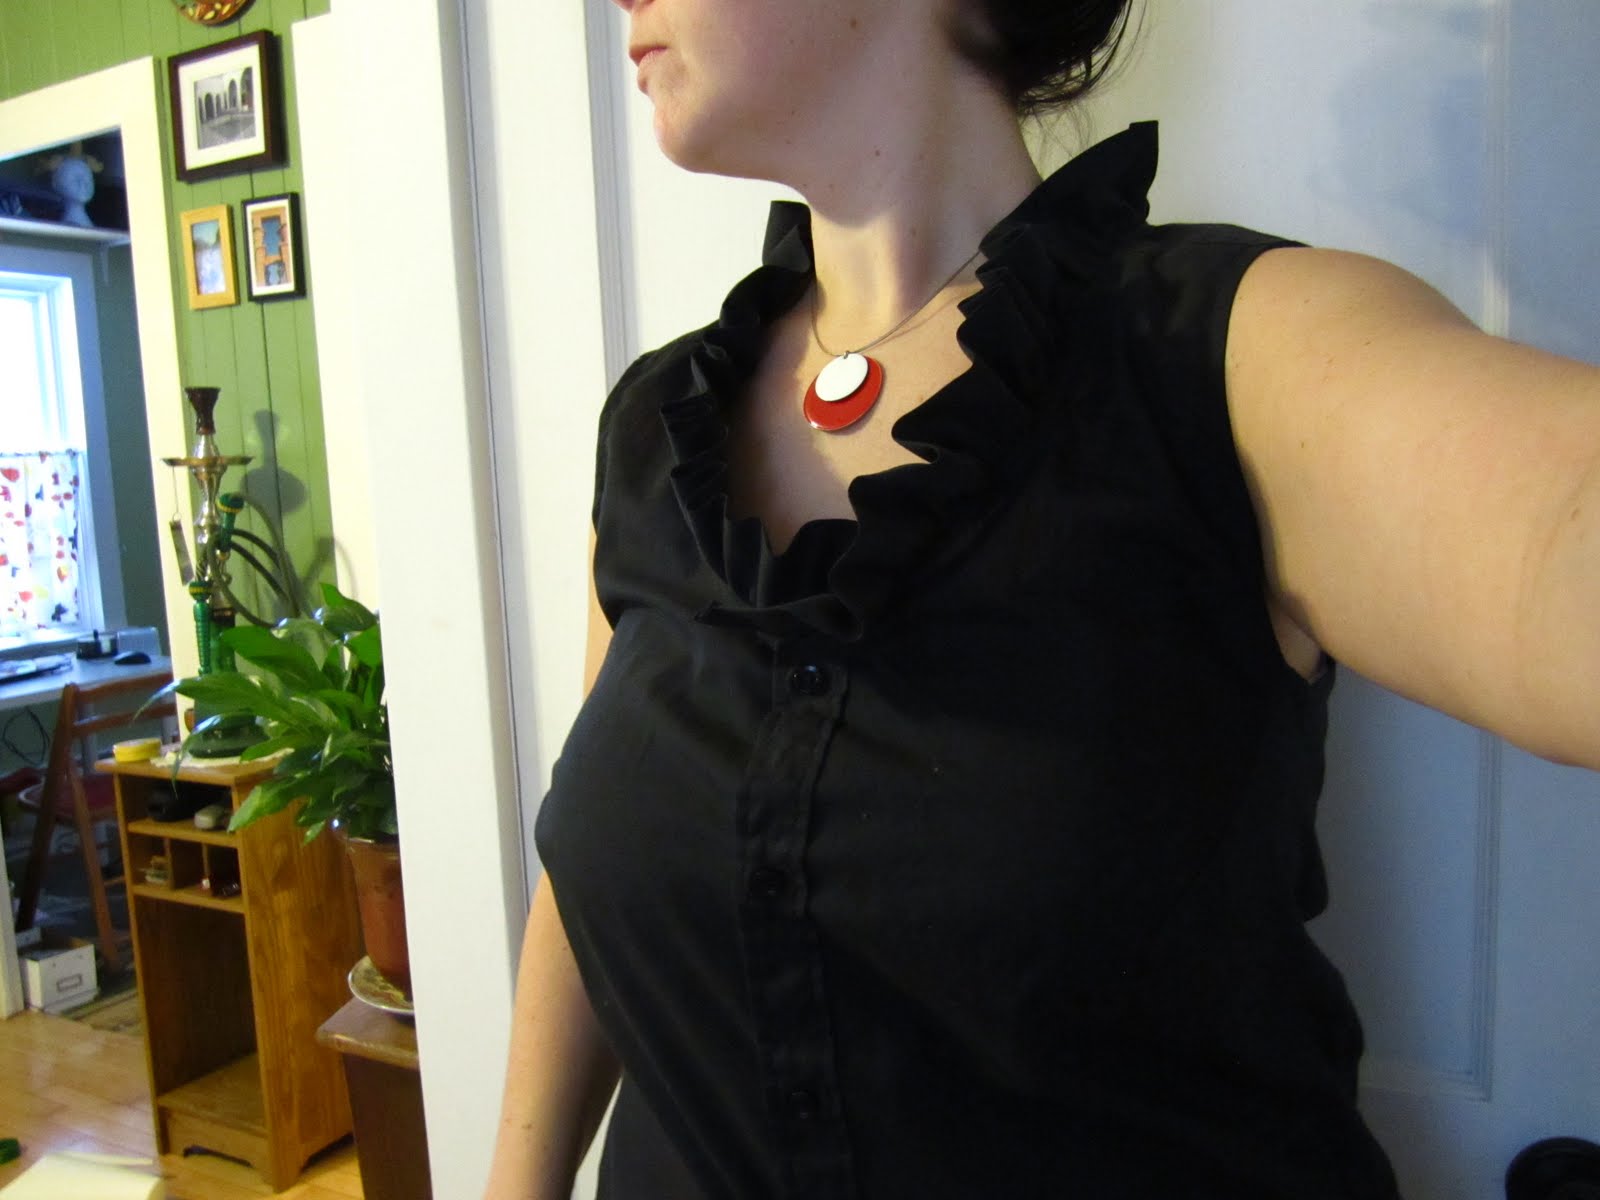 I am incredibly happy with the results. This is one of the first times I visualized what my project would look like, and the resulting piece actually looked like what I had imagined. Very happy. Then I realized that I had some interesting leftover bits that I just couldn't possibly throw away. Two cuffs, a collar, buttons, a 4-inch piece of fabric removed from the waist - they just screamed potential.
 I tackled the cuffs first, deciding that they would make great cuff bracelets. By themselves, they reminded me of the Playboy Bunny costume, and since I wasn't looking to make a fluffy white tail to complete the outfit, I went a different direction, embellishing the cuff with an assortment of buttons. My mom has this GIANT cookie tin full of buttons that date back 3 generations. None of them match, and there are some really beautiful specimens we received from a friend who was a sales representative for sewing supplies. They were absolutely PERFECT for this project.
 I picked out my favorites, decided on their placement then stitched the buttons onto the cuff, one by one. I used an assortment of flat ones and round ones, mostly in black, though I did include a touch of silver here and there for that bling factor. And I love it.
 I happen to be partial to headbands, and the collar seemed to lend itself perfectly to a hair accessory. All I needed to do was measure it on my head, open up the 2 ends, and insert a wide piece of elastic to complete the loop. One new headband!
 Finally, I used the excess fabric I removed from the waist to stitch up a cute little carnation brooch. I simply ran a line of gathering stitch along the unfinished edge, gathered it up, then bunched the bottom together and hand-stitched it into a rosette shape.
  I stitched a safety pin to the bottom of the flower, and tah dah! One pretty little flower pin.
 There you have it - four different pieces from one men's shirt, and all of it made with what I had stored away in the sewing room. I admit that I do have a relatively well-stocked sewing room, but all of what I used can be found for incredibly cheaper at a Salvation Army of Value Village store. Certainly less than the cost of buying the items new.


